
Boost Bookings: Airbnb Photos That Sell Fast
Hosting, Airbnb Photography, Short-Term Rentals
The Photos That Sell Your Property in 8 Seconds or Less
Eight seconds is all a guest gives your listing before scrolling past. Here’s how to make your photos do the heavy lifting that earns the booking.
A guest browsing Airbnb gives your listing roughly eight seconds. Maybe twelve if your cover photo catches their eye. In that tiny window, they decide whether to tap in or keep scrolling. Many “low-converting” listings aren’t really low-converting at all — they just lose the eight-second test before anyone reads a single word of your description or sees your glowing reviews.
I once hired a professional photographer for $800 and watched my booking rate climb 34% in six weeks. For two years before that, I had been shooting my own listing with an iPhone — and I honestly thought the photos were pretty good. When the new images came back, they didn’t look dramatically different at first glance. Same property, same furniture, same time of day. But the photographer knew things I didn’t: the angle that makes a small bedroom feel generous, the light that makes wood floors look rich instead of dull, the sequence that turns a random set of rooms into a clear, inviting story. The $800 paid for itself in just two bookings.
If you want your calendar to stay full without constant discounting, your photos can’t be an afterthought. Here’s what actually moves the needle.
1. Treat the Cover Photo Like It’s 80% of the Job
Your cover photo is the only photo most guests will ever fully see. It’s the one that appears in search results, in saved wishlists, and in the text they send to their travel partner with, “What about this one?” If that single image doesn’t immediately communicate comfort, clarity, and value, the rest of your gallery may as well not exist.
Choose the most distinctive, inviting, easy-to-understand photo of your entire property. For most listings, that’s a bright, welcoming living room or a hero exterior shot that shows curb appeal and outdoor space. It is almost never the bathroom, a close-up of a coffee station, or a hallway. If you’re torn between two strong contenders, rotate them for a month each and watch which one earns more clicks and inquiries — a simple A/B test that can be the difference between a fully booked summer and a half-empty one.
2. Photograph in the Right Light, Even If It Takes Three Days
Light is the hidden factor that separates “fine” photos from the ones that stop a scrolling thumb. The best listing images are shot in soft, even, natural daylight — usually mid-morning or late afternoon. Harsh noon sun creates blown-out windows and heavy shadows. Lamp-only evening photos make rooms feel small, yellow, and gloomy, even if they’re lovely in person.
Pay attention to how light moves through your property over the course of the day. If your living room faces west, photograph it late afternoon when the light is warm and flattering. If a bedroom only looks bright at 8 a.m., set an alarm and shoot it then. You may need two or three short sessions on different days to catch every space at its best. That patience shows up directly in your photos — and in your booking rate.
3. Make the Bed the Emotional Anchor of the Listing
Guests are imagining themselves in your bed before they imagine themselves anywhere else in the property. The bed is where they’ll recover from flights, binge a show, or collapse after a long day exploring. It needs to look like a place they genuinely want to sleep.
Hotel-fold the sheets so everything looks crisp and intentional. Aim for at least three pillows, four if they fit without crowding. Add a textured throw or blanket neatly folded at the foot of the bed to break up the expanse of white. Remove every personal item: no phone chargers, no half-drunk water glasses, no rumpled duvets pulled back as if someone just stood up. A beautifully made bed instantly communicates cleanliness, care, and comfort — three things you can’t afford to leave to the guest’s imagination.
4. Use Wide Angles — But Skip the Fish-Eye Trickery
A good wide-angle shot lets a guest understand a whole room at a glance. They can see where the sofa sits in relation to the dining table, how the kitchen opens into the living area, and whether there’s enough space for their group to spread out. That sense of context is essential for winning the eight-second test.
But there’s a line between helpful wide angles and misleading fish-eye distortion. On a full-frame camera, the 16–24mm range is a sweet spot: wide enough to show the full room, narrow enough that walls stay straight and furniture doesn’t look stretched. Guests recognize “real estate fish-eye” instantly; it makes them suspect the place is smaller or more awkward than the photos suggest. Honest, well-composed wide shots build trust instead of eroding it.
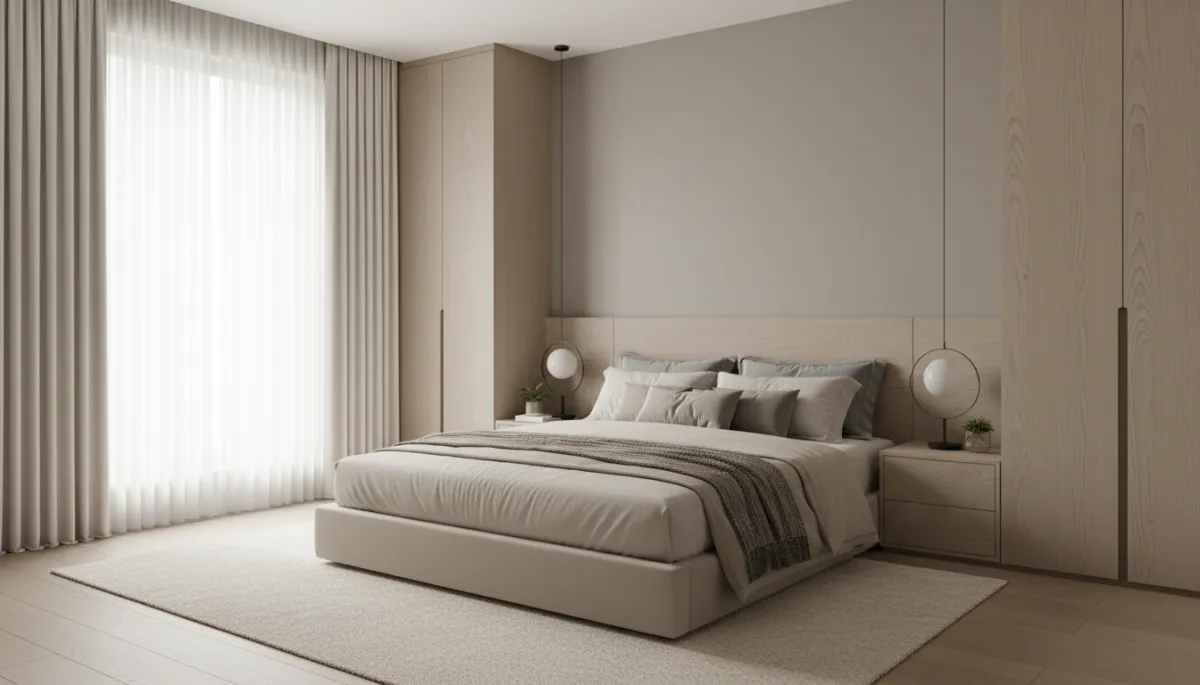
Honest wide-angle shots help guests grasp the space without feeling misled.
5. Tell a Sequence Story, Not a Random Photo Dump
Think of your photo gallery as a guided tour, not a scrapbook. The order of your images should mirror how a guest would move through the property in real life. That narrative makes the stay easy to imagine — and an easy stay is an easy “Book” decision.
A simple, effective sequence might look like this: arrival exterior, front entry, main living space, dining area, kitchen, primary bedroom, primary bath, additional bedrooms and baths, workspace or special amenities, outdoor areas, and finally one or two neighborhood highlights. Avoid jumping from kitchen to bedroom to patio to bathroom and back again. A scattered gallery feels chaotic and unfinished. A clear sequence feels intentional, professional, and trustworthy.
💡 Pro Tip: Put your strongest 10–15 photos first. Most guests never scroll all the way to the end of a 40-photo gallery.
6. Hire a Photographer — or Commit to Learning the Skill
For most hosts, professional photography is one of the highest-ROI investments you can make. Many vacation-rental photographers charge between $300 and $800 for a full shoot. If your place brings in even $40,000 a year, that’s a one-time cost that often pays for itself within the first month through higher occupancy and stronger nightly rates.
If hiring a pro isn’t realistic this season, treat photography like a real skill, not an afterthought. Spend a few hours studying real estate photography tutorials, learn the basics of composition and exposure, and shoot in RAW if your camera or phone allows it so you can adjust brightness and color during editing. The goal isn’t to create magazine art — it’s to create clear, honest, flattering images that answer a guest’s questions before they even ask them.
Win the Eight-Second Test, Fill the Calendar
The eight-second test is unforgiving, but it’s also entirely winnable. Hosts who treat their photos like a serious business decision — not something to squeeze in on a Sunday afternoon — are the ones whose calendars stay full while others slash prices and wonder what went wrong. Focus on a compelling cover photo, beautiful light, a perfectly made bed, honest wide angles, a clear visual story, and either a skilled photographer or a commitment to learning the craft. Do that, and your photos won’t just show your property — they’ll sell it.